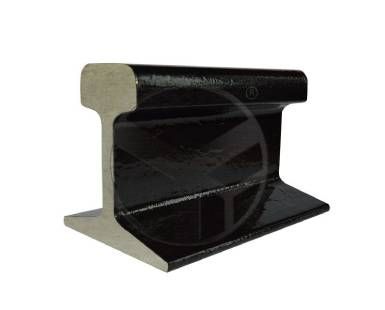
The first is the cultural level of the inspectors. Flaw detection is a highly technical type of work. The inspectors must not only be able to operate the instrument proficiently, but also master the structure of the rail and the waveform changes of the flaw detector, and judge whether there is a flaw through the waveform display and alarm on the instrument screen. Loss exists. In order to facilitate flaw detection and improve flaw detection speed, Rail flaw detectors do not have screw holes for anti-alarm square doors. Kong Bo displays inside the square door without alarm, but the inside of the door gives an alarm. Some flaw detectors mistakenly believe that as long as there is a flaw wave, the alarm will be triggered. It doesn't matter if you don't look at the waveform, which leads to the missed inspection of the small screw hole.
In addition, when the rail waist and the corresponding range of the screw hole are damaged, since the echo is displayed in the screw hole anti-alarm door, no alarm is generated. When the 37° probe passes through the joint, it will generate an alarm for the reflected wave of the jaw and the top angle of the rail end. If a hole on both sides of the connector is cracked, it will alarm when the probe moves to the connector. Then, without looking at the waveform, just listening to the alarm sound will not distinguish between the damage wave and the normal echo, which may easily cause missed detection. Therefore, the inspectors must adopt a highly responsible attitude in the operation, slow inspection, careful inspection, adhere to the three look and one listening, and continue to accumulate experience to be able to accurately determine the state of various echoes on the phosphor screen. Find damage in time to prevent missed inspection and misjudgment.
The second is the working attitude of the inspectors. In the whole process of flaw detection, it is difficult to always be energetic and focused. However, rail flaw detection is a field operation, and the environmental conditions are very poor. Under the condition that a large number of non-defect echoes are displayed at the same time, the alarm should be identified carefully. Injury wave, work extremely hard. Especially for the inspection of rail joints that are prone to cracks, due to the structural design restrictions of the rails and the influence of the joint status, it is necessary to see the waveform display on the fluorescent screen, and at the same time pay attention to the location of the probe. The wave is judged to be a screw hole wave, causing misjudgment. Furthermore, the instrument should be pushed stably during the Light Rail inspection process to prevent the instrument from tilting on the rail, and pay attention to whether there are foreign objects on the rail to prevent tripping. This shows that rail inspection personnel must have a strong sense of responsibility.
Therefore, it is very important to continuously cultivate the cultural quality and operational ability of flaw detectors, and to correct their work attitudes to effectively prevent missed inspections and misjudgments.

Light Rail
Although the ultrasonic flaw detectors currently in use have the advantages of strong penetrating ability and high damage detection rate, there are still some differences.
For nuclear damage inspection of steel rails, comprehensive inspections cannot be done, and there are blind spots. The ultrasonic flaw detector adopts a 50° probe, and uses transverse wave reflection flaw detection to detect nuclear flaws in the rail head. In order to increase its detection range, the probe is placed at an angle of about 20° with the longitudinal direction of the rail to make full use of the primary wave, The second wave is used for detection, but there is still a blind spot for the rail head, causing missed detection.
In addition, the deflection angle of the 50° probe determines the size of the detection range. When passing through frogs and joints, or when going up and down, it will cause some collisions with the 50° probe. Sometimes the bevel angle will be changed but not found in time, which may also cause leakage. Check. In addition, the flaw detector in Zone III at the bottom of the rail could not be detected, resulting in missed inspection.
Nowadays, the flaw detector mainly depends on the waveform to judge the damage, so it is more affected by subjective factors. For example, for the judgment of pores and cracks, the joint can be disassembled and inspected with the naked eye after damage is found, but the internal defects of the material cannot be judged with the naked eye. It can only be observed by experience and waveform conditions, which often causes some misjudgments. For manganese steel frogs, the existing flaw detectors cannot detect it, and it is more likely to cause misjudgment if judged by the naked eye subjectively.
The probe is one of the most important parts of the flaw detector. Its sensitivity is too low, it is easy to miss, and the sensitivity is too high, it is easy to cause clutter, form misjudgment, and also interfere with the identification of the flaw wave and cause missed detection. The performance of the instrument is unstable or the amplification channel receives a strong echo pulse signal, the sensitivity reduction or malfunction due to blocking can also cause missed detection.
If necessary, please contact the Rail Supplier
Copyright:@2020-2021
Comments Please sign in or sign up to post.
0
0 of 500 characters used