
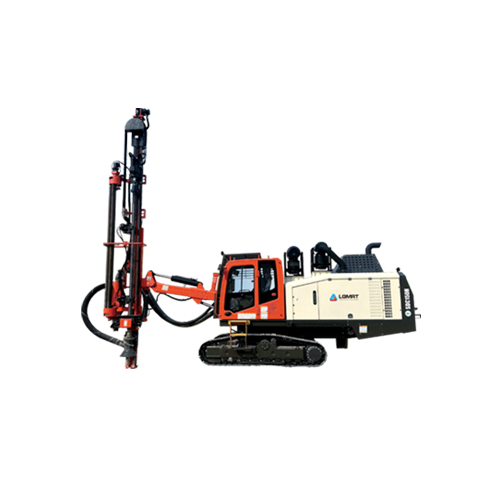
Hard rock formations present one of the toughest challenges in mining and quarrying. When you are drilling through granite, basalt, or quartzite, every variable matters—bit design, rotation speed, flushing air volume, and most critically, the pressure delivered to your down-the-hole (DTH) hammer. Many operators assume that simply cranking up the pressure will boost penetration rate. That assumption can cost you in broken hammers, wasted compressed air, and damaged drill strings. Relevant specifications and application guidance are available through Top-Hammer Drilling Rigs.
This tutorial explains the relationship between DTH hammer pressure ratings and actual drilling speed in hard rock. You will learn how to match pressure to rock compressive strength, how to read a hammer’s operating window, and how to avoid the common mistake of over-pressuring. Whether you are running a surface rig or a underground development drill, understanding these principles will help you optimize cycle times and reduce cost per meter.
Pressure ratings define the minimum, optimum, and maximum operating range for a DTH hammer; staying within these limits maximizes penetration rate and component life.
In hard rock (UCS above 150 MPa), increasing pressure from 18 bar to 24 bar can raise penetration rate by 30–50%, but only if the hammer is designed for that pressure.
Over-pressuring a hammer beyond its rated maximum causes rapid wear of the piston, chuck, and bit—often reducing service life by more than 50%.
Matching hammer pressure to rock type requires understanding the rock’s compressive strength and the hammer’s impact energy curve.
Proper air volume (CFM) is as important as pressure; insufficient flow prevents efficient chip removal and slows drilling regardless of pressure.
Before you adjust pressure settings on your DTH rig, gather the following:
Rock compressive strength data — Either from geotechnical reports or on-site point-load tests. Hard rock typically exceeds 150 MPa UCS.
Hammer manufacturer specifications — Minimum starting pressure, optimum operating pressure, and maximum allowable pressure. These are stamped on the hammer body or listed in the product manual.
Compressor capacity — Know your compressor’s maximum pressure (bar/psi) and free air delivery (m³/min or CFM). A 24-bar hammer is useless if your compressor only delivers 18 bar.
Drill rig specifications — Ensure your rig’s feed force and rotation speed can handle the torque generated at higher pressures. For example, the Top-Hammer Drilling Rigs from our range are designed for specific pressure and torque envelopes.
If you are selecting a new DTH system, review our complete lineup of Down-the-Hole Drilling Rigs to find a model that matches your target pressure range and rock conditions.
Obtain the hammer’s pressure vs. penetration rate chart from the manufacturer. Most reputable brands publish this data.
Identify three key points on the curve:
- Minimum pressure — typically 8–12 bar for standard hammers. Below this, the piston does not cycle reliably. - Optimum pressure — where penetration rate per bar of pressure is highest. Usually 18–24 bar for modern DTH hammers. - Maximum pressure — the limit beyond which internal components risk fatigue failure. Often 25–30 bar for heavy-duty hammers.
Plot your rock’s UCS on the same chart. Harder rocks require higher impact energy, which comes from higher pressure.
The relationship between pressure and penetration rate is not linear. At low pressures (8–14 bar), each additional bar yields a small increase in speed. In the mid-range (14–22 bar), the curve steepens—each bar adds 5–10% more penetration. Above the optimum, the curve flattens again. Pushing beyond the maximum gives negligible speed gain while dramatically increasing stress on the hammer.
For example, a 4-inch DTH hammer operating at 18 bar in granite (UCS 180 MPa) might achieve 0.8 m/min. At 24 bar, the same hammer could reach 1.2 m/min—a 50% improvement. But at 28 bar, penetration might only increase to 1.3 m/min, while piston life drops from 800 hours to 300 hours.
Mistake: Assuming higher pressure always means faster drilling. In very hard rock, the hammer may stall or fail to cycle if pressure exceeds the design limit. Always check the hammer’s maximum rating.
Mistake: Ignoring the compressor’s CFM at the target pressure. A compressor rated for 24 bar may deliver only 10 m³/min at that pressure—insufficient for a 5-inch hammer. The rule of thumb is 1.5–2.0 m³/min per inch of bit diameter at the operating pressure.
Mistake: Using the same pressure for all rock types. Soft rock (UCS < 50 MPa) drills efficiently at 10–14 bar. Hard rock (UCS > 150 MPa) needs 20–26 bar. Adjust pressure based on rock, not habit.
Classify your rock by UCS range:
- Soft: 25–75 MPa - Medium: 75–150 MPa - Hard: 150–250 MPa - Very hard: > 250 MPa
Select a target pressure based on the hammer manufacturer’s recommendations for that UCS range. A typical guideline:
- Soft rock: 10–14 bar - Medium rock: 14–18 bar - Hard rock: 18–24 bar - Very hard rock: 22–28 bar (only if hammer is rated for it)
Test at three pressure points within the recommended range—low, mid, and high—and measure penetration rate over a 1-meter interval. Record the time and note any hammer stalling or excessive vibration.
Rock compressive strength directly dictates the impact energy required to fracture it. A DTH hammer delivers energy through a piston striking the bit. Higher pressure increases piston velocity and impact energy. For hard rock, you need enough energy to create a crater with each blow. Too little pressure and the bit bounces without breaking rock. Too much pressure and the bit wears prematurely or the hammer overheats.
Industry data from the International Society for Rock Mechanics (ISRM) shows that for granite with UCS of 200 MPa, the optimum impact energy is approximately 400–600 J per blow. A typical 5-inch DTH hammer at 20 bar delivers about 500 J. At 14 bar, the same hammer delivers only 300 J—insufficient for efficient penetration.
Mistake: Relying on a single pressure setting for the entire shift. Rock conditions change with depth. A formation that starts as limestone (UCS 60 MPa) may transition to dolomite (UCS 120 MPa) at 10 meters. Monitor penetration rate and adjust pressure accordingly.
Mistake: Ignoring bit wear. A worn bit requires higher pressure to maintain penetration rate. Replace bits when gauge loss exceeds 3 mm. Using a worn bit at high pressure accelerates hammer damage.
Mistake: Not accounting for water ingress. Water in the hole increases friction and reduces hammer efficiency. If you encounter water, increase pressure by 2–3 bar to compensate, but stay within the hammer’s maximum rating.
Calculate the required air volume for your bit diameter using the formula: CFM = (bit diameter in inches × 1.75) × operating pressure in bar. For example, a 5-inch bit at 20 bar needs approximately 175 CFM.
Verify your compressor can deliver that volume at the target pressure. Many compressors have a pressure-volume curve—as pressure rises, volume drops.
Adjust the air control valve on the rig to match the hammer’s requirements. Insufficient air causes the hammer to “short-stroke,” reducing impact energy and slowing penetration.
Pressure alone does not drill the hole. The air must also lift cuttings out of the annulus. In hard rock, the cuttings are sharp and abrasive. If air velocity falls below 15 m/s in the annulus, cuttings settle and re-grind, wasting energy and slowing progress. A rule of thumb from the Compressed Air and Gas Institute (CAGI) is that annulus velocity should be 20–25 m/s for efficient chip removal in hard rock.
When pressure is increased without corresponding volume, the hammer may cycle faster but the hole fills with debris. Penetration rate drops because the bit is re-crushing cuttings instead of breaking fresh rock. Always match volume to pressure.
Mistake: Using a compressor with insufficient CFM for the target pressure. A 24-bar compressor that delivers only 12 m³/min at that pressure will starve a 6-inch hammer. The result is slow drilling and frequent bit jamming.
Mistake: Neglecting the air hose diameter. A 1-inch hose at 20 bar loses 2–3 bar over 30 meters. Use a 1.5-inch or 2-inch hose for long runs. Pressure drop in the hose can reduce hammer performance by 20%.
Mistake: Not cleaning the air filter. A clogged filter restricts flow. Check and clean the filter every 50 operating hours, especially in dusty conditions.
Install a pressure gauge at the hammer inlet, not just at the compressor. This gives you the actual pressure reaching the hammer.
Use a penetration rate indicator (PRI) or a simple stopwatch to measure time per meter. Record data every 2 meters.
Listen for changes in hammer sound. A consistent, sharp “pop-pop-pop” indicates proper cycling. A dull or irregular sound suggests pressure is too low or the hammer is worn.
Check the return air for color and temperature. Hot, dark return air indicates excessive friction or inefficient drilling.
Real-time monitoring catches problems before they cause downtime. A sudden drop in penetration rate at constant pressure often means the bit is dull or the rock has changed. A rise in return air temperature above 60°C suggests the hammer is overheating, which accelerates seal failure.
Data from field studies published in the Journal of Mining Science shows that operators who monitor penetration rate and adjust pressure every 2 meters achieve 15–25% higher average penetration rates than those who set pressure once per shift.
Mistake: Relying on the compressor gauge alone. Pressure drops across the swivel, hose, and drill pipe. The hammer may see 2–4 bar less than the compressor reads. Always measure at the hammer.
Mistake: Ignoring vibration. Excessive vibration at high pressure indicates the hammer is out of balance or the bit is damaged. Stop and inspect. Continuing can break the drill string.
Mistake: Not logging data. Without records, you cannot identify trends. Keep a simple log of pressure, penetration rate, and rock type for each hole. Over time, you will build a reliable pressure map for your site.
Choose a hammer whose optimum pressure matches your compressor’s output. If your compressor delivers 20 bar, select a hammer with an optimum range of 18–22 bar.
Consider the hammer’s piston weight and stroke length. Heavier pistons at lower pressure can deliver similar impact energy to lighter pistons at higher pressure. For hard rock, a heavy-piston hammer (e.g., 15 kg for a 5-inch hammer) is often more durable.
Review the hammer’s maximum pressure rating. A hammer rated for 30 bar gives you headroom if you encounter very hard rock, but running it at 30 bar continuously reduces life.
Match the hammer to the rig’s feed force. Higher pressure generates higher recoil. The rig must have enough feed force to keep the bit in contact with the rock.
Not all DTH hammers are created equal. Some are designed for high-pressure, high-speed drilling in medium rock. Others are built for low-pressure, high-torque applications in hard, fractured formations. Selecting the wrong hammer forces you to operate outside its efficient range, wasting air and wearing components.
For example, a hammer with a 14–18 bar optimum range will struggle at 24 bar. The piston may over-travel, causing the chuck to crack. Conversely, a high-pressure hammer run at 14 bar will cycle slowly and deliver low impact energy.
Mistake: Buying a hammer based on price alone. A cheap hammer with a narrow pressure range may cost less upfront but require replacement twice as often. Total cost of ownership is lower with a properly rated hammer.
Mistake: Using a hammer designed for water well drilling in mining applications. Water well hammers operate at lower pressures (10–14 bar) and are not built for the impact energy needed in hard rock mining.
Mistake: Ignoring the bit design. The bit’s carbide buttons and face profile must match the rock and pressure. For hard rock at high pressure, use a concave face bit with large carbide buttons.
Tip 1: Always start at the low end of the recommended pressure range for the rock type. Increase pressure in 1-bar increments until penetration rate plateaus. This prevents over-pressuring and extends hammer life.
Tip 2: Use a pressure regulator at the rig, not just the compressor. This allows fine adjustments without changing compressor settings. A good regulator maintains ±0.5 bar accuracy.
Tip 3: Schedule hammer rebuilds based on operating hours at high pressure. A hammer run at 24 bar for 500 hours needs a rebuild sooner than one run at 18 bar for the same time. Track pressure history, not just total hours.
Tip 4: For very hard rock (UCS > 250 MPa), consider a dual-pressure system. Some rigs allow switching between high pressure for drilling and low pressure for flushing. This saves air and reduces wear during non-drilling cycles.
Tip 5: Train your operators to recognize the sound of a properly cycling hammer. A consistent, sharp rhythm at 18–22 Hz indicates efficient operation. A slower, irregular rhythm means something is wrong.
The piston may not cycle at all, or it will cycle erratically. This causes the hammer to stall, and the bit will not penetrate. You risk damaging the piston and chuck due to incomplete strokes. Always operate at or above the minimum pressure listed by the manufacturer.
Yes, but performance will be poor. The hammer will cycle slowly and deliver low impact energy. Penetration rate in hard rock may drop by 50% or more compared to running at the optimum pressure. It is better to select a hammer whose optimum range matches your compressor’s output.
Signs include a sharp, metallic sound from the hammer, excessive vibration, rapid bit wear, and return air temperatures above 70°C. If you see any of these, reduce pressure immediately. Over-pressuring can crack the hammer casing and destroy the piston in minutes.
Understanding how DTH hammer pressure ratings affect drilling speed in hard rock formations is not theoretical—it is a practical skill that directly impacts your daily production. By matching pressure to rock compressive strength, ensuring adequate air volume, and monitoring real-time performance, you can achieve penetration rates 30–50% higher than with a one-size-fits-all approach.
The key is to treat pressure as a variable you adjust, not a fixed setting. Start low, increase in small steps, and stop when penetration rate plateaus. This method protects your hammer investment while maximizing speed.
For operators looking to upgrade their drilling equipment, we offer a range of rigs and tools designed for precise pressure control. View Products >> to explore options that match your rock conditions and compressor capacity. With over 20 years of industry experience, we can help you select the right combination of hammer, bit, and rig for your specific application.
Copyright:@2020-2021

Comments Please sign in or sign up to post.
0
0 of 500 characters used