
Water damage in wet rooms and shower enclosures is a persistent problem. Even with high-quality tiles and grout, moisture finds its way through microscopic cracks and seeps into the substrate. Once trapped, that moisture breeds mold, rots wooden framing, and compromises the entire structure. Traditional cement backer boards offer some protection, but they lack thermal insulation and can wick water through capillary action over time. Relevant specifications and application guidance are available through product catalog.
An insulated tile backer board solves both problems at once. It provides a rigid, waterproof substrate for tile adhesion while adding a continuous layer of thermal insulation behind the tiles. This means warmer floors, reduced condensation on walls, and lower heating bills. But installation is not the same as putting up drywall or standard cement board. The joints, fasteners, and waterproofing details all matter.
This guide walks through the complete process of installing an insulated tile backer board in a wet room or shower enclosure. It covers preparation, cutting, fixing, sealing, and tiling. Whether you are a contractor or a confident DIYer, the steps here will help you build a shower that stays dry for decades.
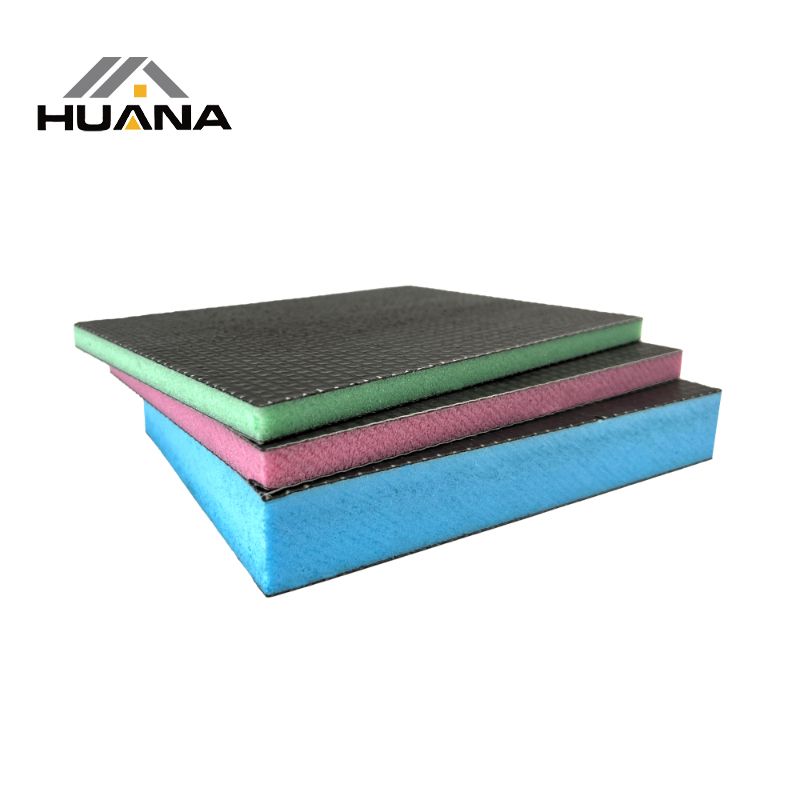
Insulated tile backer boards combine structural support with thermal insulation in one panel.
Proper surface preparation and the right fasteners prevent movement and cracking.
All joints, corners, and penetrations must be sealed with waterproof tape and membrane.
Tile installation follows standard methods but requires compatible thin-set mortar.
Regular maintenance of grout and sealant extends the life of the installation.
Before you cut your first board, gather the right materials and tools. The quality of your installation depends on using products designed for wet areas.
Insulated tile backer boards — These are rigid foam panels with a cementitious or fiberglass-reinforced facing. Hebei Huana Advanced Materials Manufacturing Co., Ltd., established in 2009 in Dacheng County, Langfang City, Hebei Province, produces a range of insulation products including tile backer boards. You can browse their full selection in the product catalog.
Waterproof membrane — Liquid-applied or sheet membrane for sealing joints and corners.
Waterproof joint tape — Alkali-resistant mesh tape designed for tile backer boards.
Thin-set mortar — Polymer-modified, unmodified, or rapid-set depending on your tile type.
Stainless steel or coated screws — Corrosion-resistant fasteners rated for wet areas.
Tile — Porcelain, ceramic, or natural stone suitable for wet rooms.
Grout — Epoxy or polymer-modified sanded grout for low water absorption.
Circular saw or utility knife with a straightedge
Drill with screwdriver bits
Notched trowel (size depends on tile)
Rubber float
Level (minimum 1.2 m / 4 ft)
Tape measure
Pencil
Safety glasses and dust mask
The substrate must be clean, dry, and structurally sound. Remove any old tile, adhesive, or loose material. Fill large gaps or holes with a patching compound. Check that the floor or wall is level within 3 mm over 2 m (1/8 inch over 6.5 ft). If the surface is uneven, the backer board will crack under tile load.
For wet rooms, the floor must slope toward the drain at a minimum of 1:50 (2 percent gradient). This ensures water runs off rather than pooling. Verify the slope with a level before installing any boards.
Measure the wall or floor area. Account for the drain location and any fixtures.
Mark the board with a pencil. Cut with a circular saw fitted with a fine-tooth blade or a sharp utility knife. For foam-core boards, score the facing, snap the board, and cut the back facing.
Dry-fit each board before applying adhesive. Leave a 3 mm (1/8 inch) gap between boards for expansion.
Cut holes for pipes or drains using a hole saw or jigsaw. Make the hole 6 mm (1/4 inch) larger than the pipe diameter to allow for movement.
Accurate cutting prevents gaps that let moisture bypass the waterproof layer. A 3 mm expansion gap is standard for insulated boards because foam expands and contracts with temperature changes. Without that gap, tiles can crack as the substrate moves.
Cutting too tight: Forcing boards into place creates stress points. Always leave the expansion gap.
Using a dull blade: A dull blade tears the foam facing, reducing the board’s structural integrity. Replace blades regularly.
Not accounting for drain slope: On floors, cut boards to follow the slope. A level board on a sloped floor creates a step that traps water.
Apply a continuous bead of polymer-modified thin-set mortar to the substrate using a 6 mm (1/4 inch) notched trowel. Work in small sections so the mortar does not skin over.
Press the board into the mortar. Use a level to check plumb and flatness. Tap with a rubber mallet if needed.
Secure the board with corrosion-resistant screws. Place screws every 150 mm (6 inches) along the edges and 300 mm (12 inches) in the field. Countersink the screw heads slightly below the surface.
Continue with adjacent boards, maintaining the 3 mm gap. Stagger vertical joints by at least 200 mm (8 inches) to avoid weak lines.
The combination of adhesive and mechanical fasteners creates a rigid assembly. Thin-set mortar fills any voids between the board and substrate, preventing movement. Screws provide immediate holding strength while the mortar cures. For wet rooms, the screw heads must be countersunk so the waterproof membrane can cover them completely.
Skipping the adhesive: Some installers rely only on screws. This leaves air gaps that allow the board to flex under tile load, leading to cracks.
Over-driving screws: Driving screws too deep crushes the foam core, reducing insulation value and creating a weak point. Stop when the head is flush or slightly below the surface.
Using standard drywall screws: These rust in wet environments. Always use stainless steel or coated screws rated for exterior or wet applications.
Apply waterproof joint tape over every seam between boards. Press the tape into a thin layer of the same thin-set mortar used for fixing. Embed the tape fully with a trowel.
Seal inside corners with a flexible waterproof membrane. Use a liquid-applied membrane or pre-formed corner pieces. Extend the membrane 100 mm (4 inches) onto each surface.
Cover all screw heads with a dab of waterproof membrane. A small brush or roller works well.
Apply a continuous layer of liquid waterproof membrane over the entire board surface. Follow the manufacturer’s recommended dry-film thickness — typically 0.5 to 1.0 mm (20 to 40 mils). Allow to cure fully before tiling.
The waterproof membrane is the primary barrier against moisture. Even the best backer board has seams and fastener holes that leak if not sealed. Industry standards such as ANSI A118.10 and the Tile Council of North America (TCNA) handbook require a continuous waterproof membrane in wet areas. Skipping this step voids most warranties and guarantees failure within a few years.
Applying membrane too thin: A thin coat cracks under tile movement. Use a wet-film gauge to verify thickness.
Sealing only the joints: Water can migrate through the board facing if the entire surface is not coated. Always cover the full area.
Tiling before membrane cures: Curing times vary from 2 to 24 hours depending on temperature and humidity. Check the manufacturer’s data sheet.
Choose a thin-set mortar compatible with your tile and the backer board. For porcelain or large-format tiles, use a polymer-modified mortar with high bond strength.
Apply mortar to the backer board using a notched trowel held at a 45-degree angle. The notch size should match the tile — 6 mm (1/4 inch) for small tiles, 12 mm (1/2 inch) for large format.
Back-butter each tile with a thin layer of mortar. This ensures full coverage and eliminates voids.
Press the tile into place. Use spacers to maintain consistent joint width — 2 to 3 mm for walls, 3 to 5 mm for floors.
Check level frequently. Adjust tiles immediately before the mortar sets.
Full mortar coverage is critical in wet rooms. Voids behind tiles collect water that freezes and expands, popping tiles loose. Back-buttering guarantees contact over the entire tile surface. For floors, the larger joint width accommodates thermal expansion and provides a better grip for grout. Relevant specifications and application guidance are available through available solutions.
Using the wrong trowel notch: A notch that is too small leaves insufficient mortar; too large creates excess that squeezes into joints. Match the notch to the tile size.
Not back-buttering: This is the most common cause of hollow-sounding tiles and eventual failure. Always back-butter.
Walking on fresh tile: On floors, protect the installation with plywood or foam boards until the mortar cures fully — typically 24 to 48 hours.
Wait at least 24 hours after tiling before grouting. For large-format tiles, wait 48 hours.
Mix grout according to the manufacturer’s instructions. For wet rooms, epoxy grout is preferred because it is non-porous and resists staining.
Force grout into the joints using a rubber float held at a 45-degree angle. Remove excess with a damp sponge.
After grout cures (24 hours for epoxy, 72 hours for cementitious), apply a penetrating sealer to the tile surface. For natural stone, use a stone-specific sealer.
Grout is the secondary waterproofing layer. Epoxy grout has a water absorption rate below 0.1 percent, compared to 5–10 percent for cementitious grout. In a wet room, that difference matters. Sealing the tile surface adds another barrier, especially for porous materials like marble or travertine.
Grouting too early: Moisture trapped under the grout causes efflorescence and mold. Wait the full curing time.
Using sanded grout on narrow joints: Sanded grout requires joints wider than 3 mm (1/8 inch). For narrower joints, use unsanded grout.
Skipping the sealer: Even glazed tiles have microscopic pores at the edges. Sealer protects the entire surface.
Pre-drill for screws: In dense foam boards, pre-drilling prevents the screw from spinning and stripping the core. Use a 3 mm (1/8 inch) bit.
Use a laser level: For large wet rooms, a laser level ensures consistent slope and alignment across the entire floor.
Test the waterproof membrane: After curing, perform a flood test. Block the drain and fill the wet room with 25 mm (1 inch) of water. Let it sit for 24 hours. If the water level drops, there is a leak.
Consider heated floors: Insulated backer boards pair well with electric radiant heating mats. The insulation directs heat upward instead of into the subfloor, improving efficiency by 20–30 percent.
Check local building codes: Some jurisdictions require a specific thickness of insulation or a particular type of waterproof membrane. Always verify before starting.
No. The old tile must be removed. Installing over existing tile creates an uneven surface and traps moisture between the layers. Remove all old tile, adhesive, and waterproofing before starting.
For floors, use a board at least 12 mm (1/2 inch) thick. Thicker boards provide more insulation but require deeper subfloor preparation. Check the manufacturer’s load rating — most boards rated for floors can support up to 1,500 kg/m² (300 psf).
In most cases, no. The insulated backer board itself acts as a vapor retarder. However, in extremely cold climates or over unheated spaces, a separate vapor barrier may be required. Consult local building codes.
No. Drywall screws are not corrosion-resistant. They rust in wet environments, causing the board to loosen and the tile to crack. Use only stainless steel or coated screws rated for exterior or wet applications.
For a standard 3 m² (32 sq ft) wet room, expect 2–3 days: one day for board installation and waterproofing, one day for tiling, and one day for grouting and sealing. Curing times add another 24–48 hours before the room can be used.
Installing an insulated tile backer board in a wet room or shower enclosure is a straightforward process when you follow the right sequence. Start with a clean, level substrate. Cut and fix the boards with adhesive and corrosion-resistant screws. Seal every joint, corner, and fastener with a continuous waterproof membrane. Then tile with full mortar coverage and finish with epoxy grout and sealer.
The result is a shower that stays warm underfoot, resists mold, and lasts for decades. For large-scale projects, Hebei Huana Advanced Materials Manufacturing Co., Ltd. offers a range of insulation solutions. Their work on projects like the Insulation Solutions for Daxing Airport demonstrates the reliability of their products in demanding environments. You can explore other available solutions for commercial and industrial applications.
The key is patience. Rushing any step — especially the waterproofing — leads to failures that are expensive to repair. Take the time to do it right, and your wet room will perform as intended for years to come.
Previous: How PU Stone Panels Provide Superior Insulation for Buildings
Next: 5 Industries That Can Benefit From The Use Of Ground Protection Mats
Copyright:@2020-2021

Comments Please sign in or sign up to post.
0
0 of 500 characters used