
Before patient use, verify an Anesthesia Breathing Circuit in six stages: inspect every component, assemble all accessories, perform the machine-specific pressure leak test, assess valves and ventilation with a test lung or second bag, confirm alarms and monitoring, then document the result and remove failed equipment from service. Always follow the anesthesia machine and circuit manufacturer’s instructions for use.
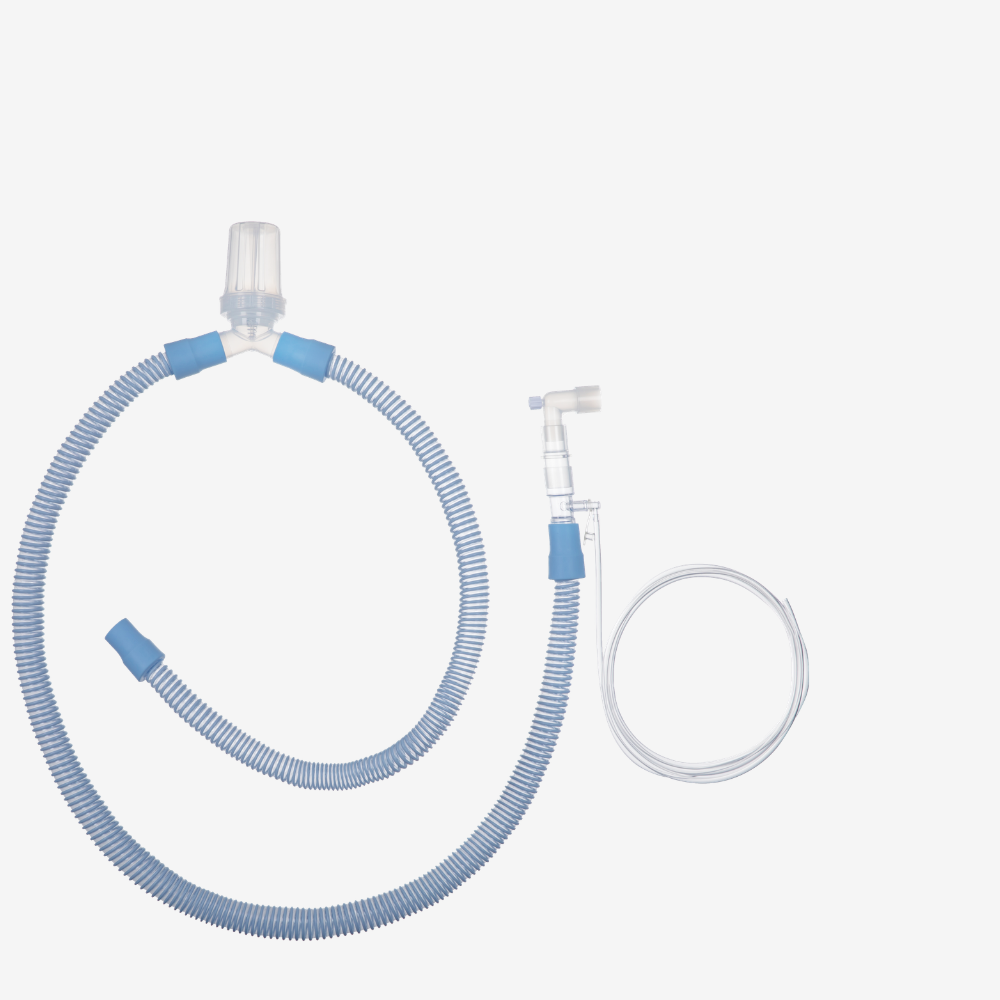
An anesthesia breathing circuit integrity check confirms that the breathing system can deliver and remove gases without unacceptable leakage, obstruction, disconnection, or valve malfunction. This article explains How to Inspect and Verify Anesthesia Breathing Circuit Integrity Before Patient Use, including visual inspection, connection verification, pressure testing, functional ventilation testing, troubleshooting, documentation, and equipment disposition.
A circuit may appear intact while still containing an occluded port, a partially detached connector, a misplaced valve, or a restriction created during positioning. A pressure-only test can also pass when the circuit contains an obstruction that prevents adequate inspiratory or expiratory flow. For that reason, safe verification must combine visual, pressure, and functional checks rather than relying on an automated machine self-test alone. (accessdata.fda.gov)
Inspect tubing, valves, bags, filters, connectors, and patient-end components before connecting the circuit.
Use the anesthesia machine’s specified pressure target, hold time, and leak acceptance limit.
Functional testing must verify gas flow, valve movement, bag or bellows cycling, pressure, and delivered volume.
A failed check requires isolation, replacement, repeat testing, and biomedical service when the fault remains unidentified.
Automated self-tests may detect leaks but can miss occlusions, misconnections, and incorrect accessory assembly.
Separate daily checkout, before-each-patient checks, circuit-change checks, and post-repair verification.
An anesthesia breathing circuit provides the inhalation and exhalation pathway between the anesthesia machine and the patient airway. Depending on the system, it may include inspiratory and expiratory limbs, a Y-piece, elbow, reservoir bag, bacterial or viral filter, sampling line, water trap, connectors, valves, and a scavenging connection. A fault in any one component can affect oxygen delivery, carbon dioxide removal, anesthetic delivery, airway pressure, or monitoring accuracy.
Regulatory safety reports show that circuit failures are not limited to visible tubing cracks. Reported problems have included cracked expandable hoses, loose or detached water traps, Y-pieces separating from tubing, and caps or foreign components obstructing the gas pathway. These conditions can cause inadequate ventilation, hypoxia, hypercarbia, or interrupted anesthetic delivery. (fda.gov)
A complete check therefore answers three different questions. First, is the circuit physically complete and correctly assembled? Second, does it hold pressure within the limit specified by the machine or circuit manufacturer? Third, can it support manual and mechanical ventilation without abnormal resistance, valve sticking, volume loss, or pressure behavior?
Perform the check in a controlled environment before the patient is connected. The required items normally include the anesthesia machine, the intended breathing circuit, reservoir bag, breathing filter, gas sampling line, water trap if applicable, airway connector, test lung or second breathing bag, and the manufacturer’s instructions for use.
Confirm that the circuit is appropriate for the patient category and machine configuration. Adult, pediatric, and neonatal systems may have different internal volumes, connector sizes, compliance values, and alarm limits. A circuit intended for one ventilator model may not produce valid results on another model, especially when the machine calculates circuit compliance during its automated checkout.
Use a clean and traceable inspection process. Record the date, machine identification, circuit type, lot or batch number when required by local policy, operator initials, test result, and any corrective action. Tuoren Medical describes lifecycle quality controls that include material selection, manufacturing, sterilization, inspection, packaging, and batch release, with traceability and regulatory documentation intended for healthcare and distribution environments. (tuorenmed.com)
Begin with the package, label, and circuit configuration before connecting anything to the machine. Check that the package is sealed, dry, within its use period, and free from puncture or crushing damage. For a sterile single-use circuit, do not use it if the package has been opened, torn, wet, or contaminated.
Inspect the entire circuit from the machine-side connectors to the patient-end connection. Use the following visual and physical sequence:
Examine each limb for cuts, cracks, pinholes, kinks, flattening, excessive stretching, or separation between corrugated sections.
Inspect smooth-bore tubing for deformation, discoloration, internal debris, or foreign objects.
Check the Y-piece, elbow, swivel, adapters, and angle connectors for cracks, looseness, incomplete molding, or rotation that disconnects the fitting.
Confirm that all ports are open when they should be open and capped only when required by the design.
Inspect the reservoir bag for holes, brittle material, torn seams, damaged necks, or a loose bag connector.
Check the inspiratory and expiratory valves for correct orientation, free movement, clean seating surfaces, and visible damage.
Inspect filters, sampling lines, water traps, humidification components, and scavenging connections.
Verify that the patient-end connector matches the airway device and is fully seated.
Remove packaging caps, protective plugs, and shipping components that are not intended to remain in the gas pathway.
Confirm that no accessory is attached to an incompatible port or obstructing the main breathing path.
Do not treat flexibility as proof of integrity. A circuit can remain visually normal while leaking at a molded joint, valve seat, connector, or hose section that is stretched during positioning. Recent safety communications have specifically advised leak testing after flexible hose extension because cracks may develop or become apparent after the hose is lengthened. (fda.gov)
The visual inspection detects faults that a pressure test may not classify correctly. For example, a completely occluded patient-end port can allow the circuit to pressurize and pass a static pressure check while preventing gas from reaching the patient. A misplaced one-way valve may also produce an apparently stable pressure but cause inadequate exhalation or rebreathing during ventilation.
The patient-end components deserve the same attention as the machine-end connections. Check the endotracheal tube or supraglottic airway connection for secure fit, but do not connect the circuit to the patient until the machine and circuit checks are complete. Confirm that the sampling line, filter, and elbow do not create a hidden obstruction or excessive dead space for the intended patient category.
Inspecting only the two breathing limbs: Include valves, bag, filters, sampling line, Y-piece, connectors, and all patient-end accessories.
Leaving a protective cap in place: Remove nonfunctional caps and plugs before testing the gas pathway.
Stretching the circuit after testing: Position the circuit as it will be used, then repeat the leak test if the tubing length or routing changes.
Ignoring loose molded joints: Replace a circuit when a Y-piece, water trap, connector, or valve housing moves abnormally.
Assuming a new package cannot contain a defect: Perform the same pre-use inspection on new and previously stored circuits.
Attach the circuit to the machine according to the machine manufacturer’s configuration. Connect the inspiratory limb, expiratory limb, reservoir bag, Y-piece, filter, sampling line, water trap, and scavenging components as applicable. Confirm that each connection is fully inserted and does not rotate free with light hand pressure.
Use a connection map when the circuit has multiple ports or accessories. The map should identify the inspiratory port, expiratory port, manual bag connection, ventilator connection, pressure-sensing line, gas-sampling line, and patient connection. This reduces the risk of misconnections after changing a patient circuit or moving the machine between operating rooms.
Check the circuit in both manual and ventilator configurations. Some anesthesia machines use a selector, bag-to-ventilator switch, APL valve, or manual/automatic ventilation control. A circuit can pass a static check while still being connected to the wrong mode or having a component bypassed. Confirm that the selected mode matches the intended test and that unused ports are closed only as specified.
A complete anesthesia circuit inspection is not the same as a leak test. Inspection verifies physical condition and assembly, while the leak test verifies pressure retention or measured leakage under defined conditions. Functional ventilation testing adds a third layer by confirming that gas actually travels through the intended route.
The anesthesia machine pre-use checkout should include the breathing system rather than treating it as a separate disposable accessory. Published checkout procedures include occluding the Y-piece, checking circuit leaks, verifying manual ventilation, testing mechanical ventilation, confirming unidirectional valve behavior, and checking alarms. (asahq.org)
Testing the circuit before final assembly: Add the filter, sampling line, water trap, bag, and other intended accessories before the final check.
Connecting a test lung to the wrong port: Confirm that the test lung is attached to the patient-end Y-piece or the location specified by the machine procedure.
Leaving the APL valve in an unintended position: Set the APL valve according to the manual or ventilator test being performed.
Failing to identify the circuit configuration: Record whether the setup is circle, non-rebreathing, coaxial, pediatric, or another design.
The anesthesia breathing circuit leak test must use the pressure target, test mode, flow condition, and acceptance criteria specified by the anesthesia machine and circuit instructions. Do not apply one pressure value or one leak limit to every machine and circuit combination.
A common manual test sequence on some anesthesia machines is:
Set the machine to the manufacturer’s specified manual or standby test condition.
Turn fresh gas flows to the required setting, often off or at a minimal flow according to the procedure.
Occlude the Y-piece or patient-end connection with a test plug or approved method.
Close or set the APL valve as instructed.
Use the oxygen flush or approved test flow to pressurize the breathing system.
Raise the circuit to the specified target, such as 30 cmH₂O, only when that value is listed in the applicable machine checklist.
Hold the target pressure for the specified period, such as 10 seconds where permitted by the local procedure.
Observe the pressure gauge or machine display for a fall below the acceptance limit.
Release pressure slowly by opening the APL valve or using the manufacturer’s pressure-release method.
Repeat the test after correcting any connection, accessory, or routing issue.
For example, an anesthesia machine checklist may instruct the user to occlude the Y-piece, pressurize the circuit to 30 cmH₂O, and confirm that pressure does not decrease below 30 cmH₂O. Other machines report a measured leak in milliliters per minute and use a different threshold, such as a manufacturer-defined limit. One published anesthesia checkout protocol identifies a leak greater than 150 mL/min as a condition requiring labeling and biomedical engineering review when the source cannot be found. (asahq.org)
A pass requires more than reaching the target pressure. The circuit must maintain pressure within the machine’s stated tolerance, show no audible or visible leak, and remain correctly assembled after the test. If the machine calculates compliance or leak automatically, record the displayed result and compare it with the machine’s acceptance range.
Release pressure gradually after the test. Sudden removal of an occlusion can produce a rapid pressure change, disturb a valve membrane, or cause a loose connector to detach. Never perform a high-pressure test while the patient is connected, and never leave the patient-end occluded when returning the machine to clinical use.
A pressure test identifies leaks at tubing walls, molded joints, connectors, valves, bags, filters, and machine interfaces. It can also expose a leak that appears only after the circuit is stretched or repositioned. FDA safety communications have connected circuit cracks and detached components with inadequate ventilation and have recommended removing affected or failed circuits from use. (fda.gov)
However, a static pressure check does not prove that the circuit is free of obstruction. If a port is blocked, gas may not reach the blocked section, allowing the remaining portion of the system to hold pressure. This is why the leak test must be followed by flow and ventilation testing.
Using a universal pressure target: Use 30 cmH₂O only when the applicable machine procedure specifies it.
Holding pressure indefinitely: Use the stated hold time; extended occlusion can create unnecessary stress and may not improve detection.
Testing with the patient connected: Perform the check before patient connection.
Ignoring a small measured leak: Compare the value with the manufacturer’s acceptance limit and investigate any change from baseline.
Failing to repeat the test after adjustment: Any circuit repositioning, accessory change, or connector repair requires repeat verification.
Attach an approved test lung or second breathing bag to the patient-end connection. Start with manual ventilation and observe whether the reservoir bag fills, compresses, and refills without abnormal resistance. Confirm that the pressure gauge responds to squeezing or flow changes and that the APL valve releases pressure smoothly.
Observe the inspiratory and expiratory unidirectional valves during manual or mechanical ventilation. The valves should move in the intended direction and return to their seats without sticking, fluttering, or remaining partially open. In a circle system, abnormal valve movement can cause rebreathing, increased resistance, inaccurate volume delivery, or an unexpected pressure pattern.
Switch to mechanical ventilation using a test lung. Verify that the ventilator produces the selected pattern and that measured tidal volume, minute volume, airway pressure, respiratory rate, and PEEP are within the machine’s displayed or locally accepted ranges. The exact values depend on the test settings, but the test should show repeatable cycling rather than an unexplained difference between set and measured ventilation.
Check the low-pressure and high-pressure alarms, apnea alarm, disconnect alarm, continuing-pressure alarm, oxygen monitoring, and volume monitoring. Confirm that an intentional circuit disconnection produces the expected alarm and that the alarm resets only after the connection is restored. If the machine includes automatic compliance compensation, confirm that the system completes the required calibration with the final circuit attached.
Functional ventilation testing detects faults that can survive a pressure check. These include obstructed limbs, incorrect valve orientation, blocked ports, excessive resistance, a restricted filter, a collapsed coaxial pathway, and a ventilator-to-circuit misconnection. FDA reports have described breathing circuit obstructions caused by caps or other components that remained in the gas pathway, demonstrating why flow testing is necessary. (accessdata.fda.gov)
Automated self-tests primarily evaluate the machine under a defined internal test condition. They may not detect an obstruction located beyond a blocked or incorrectly assembled component, especially when the test does not challenge both directions of gas flow. A simple pressure check may also pass if the occluded section is isolated from the pressurized portion of the circuit.
Relying on bag movement alone: Confirm pressure, flow direction, valve movement, and measured ventilation.
Skipping mechanical ventilation: Manual ventilation can appear normal while the ventilator mode, bellows, piston, or flow sensor is malfunctioning.
Using an unsuitable test lung: Match the test lung and test settings to the machine procedure and patient category.
Ignoring unusual resistance: Increased resistance may indicate a kink, wet filter, blocked port, collapsed tubing, or valve problem.
Failing to test alarms: A circuit can ventilate during a check but still fail to signal disconnection or excessive pressure.
A failed integrity check should be classified before corrective action. The following decision tree separates the main failure categories:
| Observed result | Most likely failure category | Immediate action |
|---|---|---|
| Pressure falls during static test | Leak | Check connectors, bag, valves, filter, tubing, and machine interface |
| Pressure holds but test lung receives no flow | Obstruction or closed port | Stop use, inspect for caps, plugs, kinks, blocked filters, and collapsed tubing |
| Flow travels in the wrong direction | Misconnection or valve failure | Stop use, verify assembly and valve orientation, replace if unresolved |
| Manual bag cycles but mechanical ventilation fails | Ventilator, flow sensor, mode, or bellows fault | Isolate machine and call biomedical service |
| Mechanical ventilation works but pressure or volume is unstable | Leak, compliance issue, valve fault, or sensor problem | Repeat with known-good circuit and investigate machine status |
| Alarm does not activate during disconnection | Alarm, sensor, or software fault | Remove machine from clinical use until evaluated |
| Circuit component separates during testing | Connector, adhesive joint, or molding failure | Replace circuit and quarantine the failed item |
If the leak is found in the disposable circuit, replace the complete circuit or the affected component only when the manufacturer and facility policy permit component-level replacement. Do not repair tubing with tape, adhesive, clamps, or improvised connectors. If the replacement circuit also fails, use a known-good circuit to distinguish a circuit fault from a machine fault.
Stop testing when a component detaches, pressure rises unexpectedly, the machine shows an unresolved fault, or the test cannot be performed according to the instructions. Label the equipment clearly, isolate it from clinical use, notify the responsible anesthesia equipment technician or biomedical engineering department, and provide backup ventilation equipment before patient induction.
The following checklist separates the timing of verification so staff do not apply the same abbreviated process to every situation.
Verify machine power, gas supply, oxygen source, cylinders, and pipeline connections.
Check vaporizers, vaporizer interlocks, absorbent, scavenging, suction, and oxygen flush.
Perform the machine’s automated leak, compliance, flow sensor, and electronic checks.
Verify APL operation, unidirectional valve movement, ventilator operation, alarms, and monitoring.
Confirm that backup ventilation equipment is present and functional.
Document the daily checkout before the first case.
Confirm the correct circuit size and configuration.
Inspect all tubing, connectors, bag, valves, filters, ports, and patient-end components.
Verify endotracheal tube or supraglottic airway connection compatibility.
Check the gas sampling line, water trap, and scavenging connection.
Perform the required circuit leak test.
Test manual and mechanical ventilation with a test lung or second bag.
Confirm alarm response and return the machine to the intended operating mode.
Repeat visual inspection and connection verification.
Repeat leak and compliance testing if the machine requires it.
Repeat manual and mechanical ventilation testing.
Recheck tidal volume, pressure, PEEP, disconnect alarms, and oxygen monitoring.
Document the circuit change and test result.
Confirm the repair record and equipment status.
Run the complete machine checkout rather than only a circuit pressure test.
Use a known-good circuit and test lung.
Verify alarms, sensors, valves, manual ventilation, mechanical ventilation, and pressure control.
Return the machine to service only after the responsible technician or authorized user records a pass.
The breathing circuit is one part of the anesthesia machine pre-use checkout, not a substitute for the full machine test. The machine may have faults in gas supply, oxygen concentration monitoring, flow measurement, ventilator mechanics, pressure sensing, alarm logic, vaporizer function, or scavenging even when the circuit itself passes inspection.
Use the machine’s automated checkout when available, but interpret it as one layer of verification. A machine self-test may identify a leak or compliance problem inside the tested system, yet a downstream obstruction, incorrect accessory, blocked port, or patient-end misconnection may remain undetected. The final check should therefore include the fully assembled circuit, a test lung or second bag, and an intentional disconnection test.
Between cases, a shortened procedure may be permitted only when the machine has not been moved, altered, or exposed to a circuit change. If the machine has been repositioned, repaired, disconnected from gas supplies, or fitted with a new circuit, return to the full manufacturer-specified checkout. A published anesthesia machine protocol similarly distinguishes a full daily check from abbreviated checks between cases. (asahq.org)
Copyright:@2020-2021

Comments Please sign in or sign up to post.
0
0 of 500 characters used